I would like to be able to get Netcall to play a messge that is the result of looking up and find a match from a simple CSV data source.
i.e. caller calls in to dialogue from various DDIs sources.
These all route to a single dialogue
The dialogue interprets the DDI from a system variable and based on this looks up that value in a table and returns a new value - possible an uploaded .csv file
the dialogue then plays the new value back to the caller.
I can see hwo this woudl be carried out using nested/if/then logic statements but I want to have over 100 inbound DDI routes to this single dialogue and a massive if/then woudl be messy and difficult to edit when required.
Hello, @GordonIng Dialogue Builder can look at a CSV file and provide routing based on the result. You would need to upload data to the Dialogues area of your system and use Query and Logic blocks to base your routing. It sounds complicated, but actually, it is very straightforward.
So that I understand, you want to point 100+ DDI’s into a single Dialogue that looks at a .csv file that checks the DDI and then performs an action.
Can you advise on the action? Do you want it to route to a different place? Do you want to play back a set value?
Happy to set up a call to discuss this if you would prefer (send me a private message with your email, and we can arrange a time). We can then post back to the forum regarding the set up.
Thanks
Jonathan.
Thanks for the confirmation Godon. What you want to achieve is that when a caller dials a number, you want to advise them of the new number; ok with a small number, but how can you do this for an extensive, ever-changing list of numbers?
Let’s take a look.
Data File
The first port of call is the data file. We need a .csv data. This needs to be set out in the following format.

The first two columns, A and B, are Key Values; these are the columns that the Query Block will use to look up and validate data (more on that later). I only want to use one Key value, so I leave the second column blank (column B). It is up to you to use header rows; I like them for my reference. The following ten columns C-L are Value fields; this is where you will add the value data you want to utilise. In this example, I only use column C (value1), but I could use column D as a name for the department/service, again just for reference, but I could also play that back to a caller as well.
Dialogue Data Setup
I have a data file, which I will name and save as a .csv (Comma Delimited). In this example, I have called it ddichange.csv. I need to add the Data Source to Dialogue Builder. Go to your Liberty Converse system > Dialogues, and then on the blue bar, select Data, then click Add.
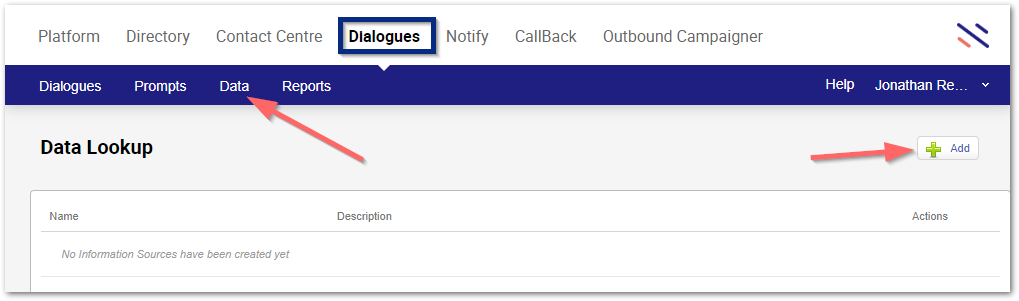
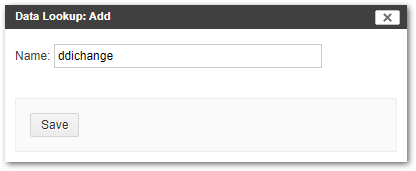
Give the name of your .csv file (e.g., ddichange) and click Save.
Next, you can see and set your Data Souce settings; the key one to note is the Skip First Line; in my example, I am using a Header Row so I would change this to Yes. The Data Preview will show you what your data looks like. And the FTP link will advise you where the data should be uploaded to.
Click Save when done.

A word on where to upload your data. You will need read/write permissions to upload this to the D:\syncrhonisation\px(the number listed here)\DialogueData on your main web server. A System update will need to be run to import and push this data to your other servers. If your system is hosted within the Netcall Cloud, you will need to use the API to upload the file to your cloud source - more information on APIs can be found in the documents portal.
Once a system update has run, you can view the status of your data source - by going into its details.
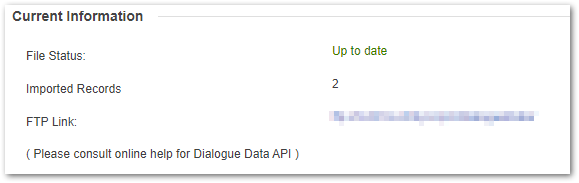
This data source is now ready to be utilised by Dialogue Builder.
Dialogue
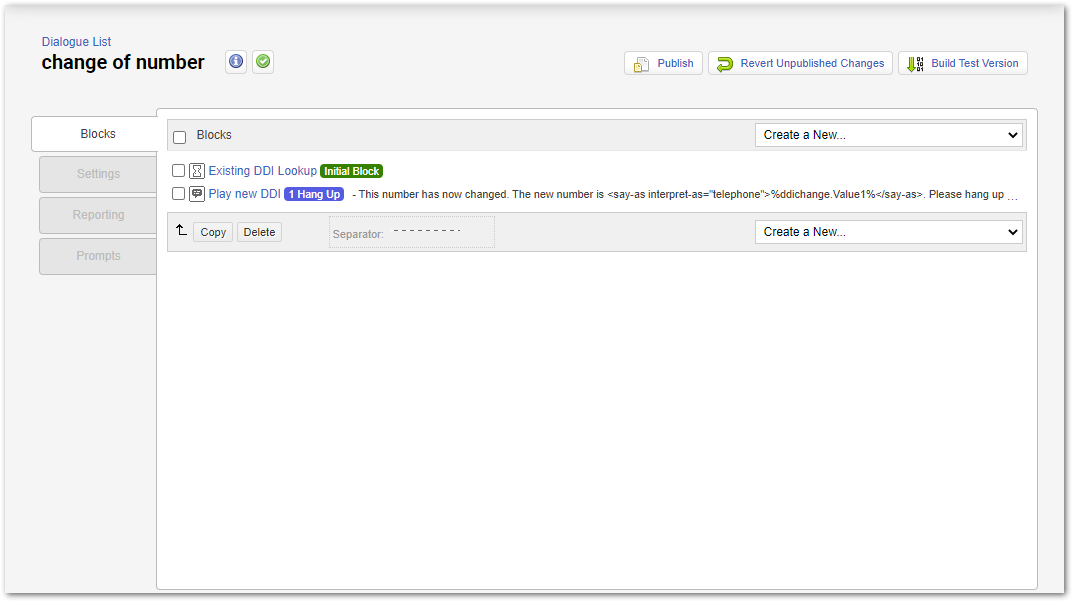
To create a Dialogue to work with this scenario, I need a Dialogue with the following two blocks.-
Query Block
-
Message Block
Let’s take a look at each one.
Query Block
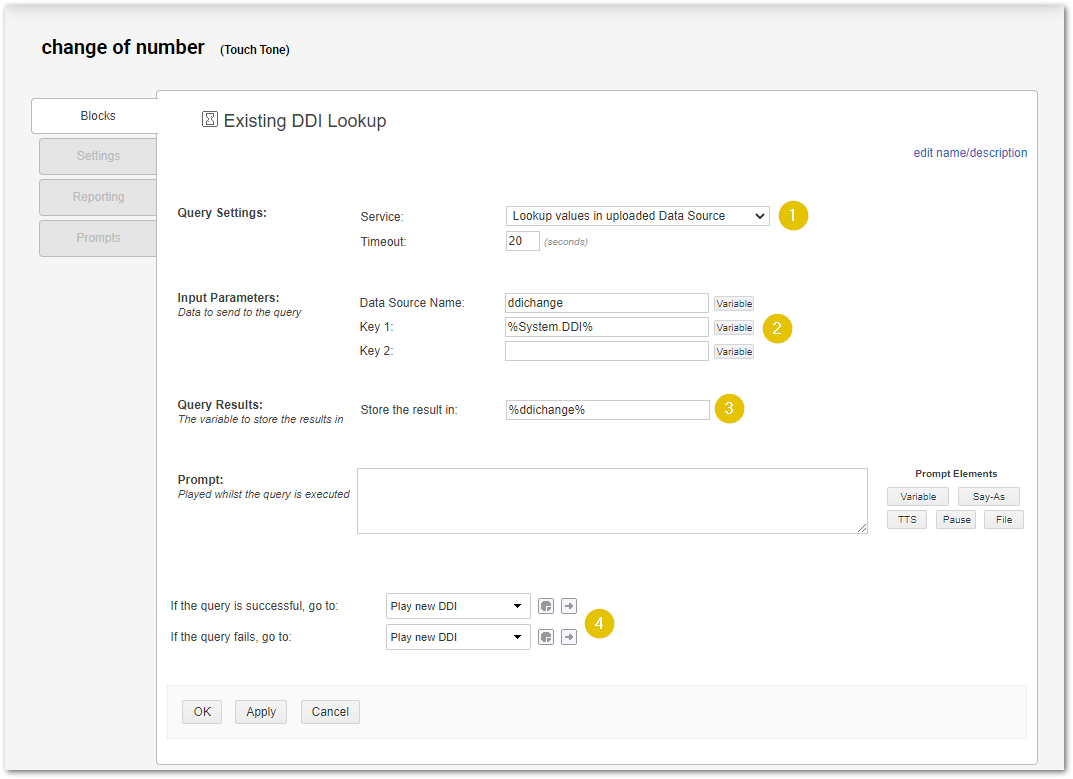
In the image below, we see the following:
-
Using the drop-down list, I select Lookup values in uploaded Data Source. (This is to tell the Dialogue to look for data sources uploaded using the Data tab).
-
In the Data Source name, I add the name of the Data Source I want to look up. In Key 1: I use the Variable of %Syste.DDI% (This is the number that the caller dialled as displayed within the Recent Call Report (it is crucial that this number in Key 1 matches what is presented to the system). I can either type this or click on the Variable button, then select > %System% > %System.DDI% from the lists.
-
Within the Store the result in: field. I give it a variable name of %ddichange%. This stores this Key value to use later in the Dialogue.
-
The next step is to load a block if the Query passes/fails. In this example, I am loading the same block, my Play New DDI Message Block. I can send it to a different block if my Query fails (a good best practice), but I will leave it all to the same Message for this demo.
Once created, I can then set up my Message Block.
Message Block
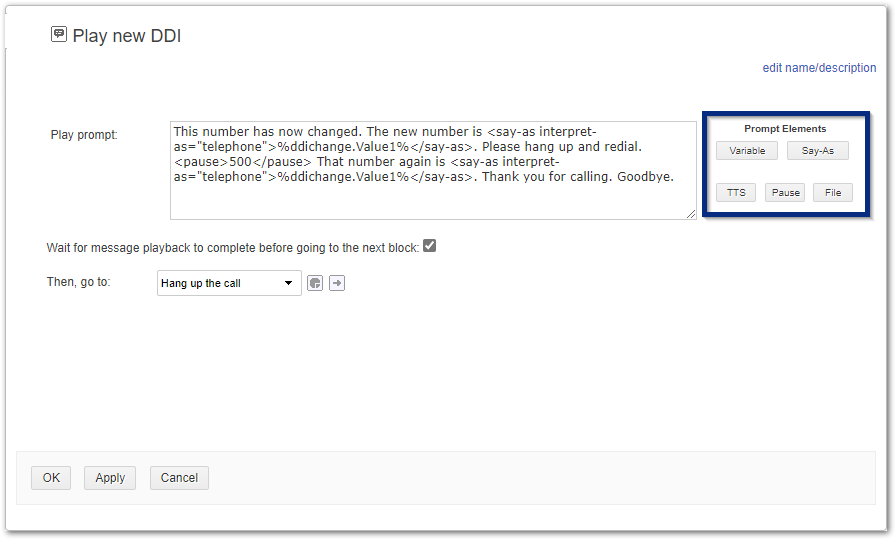
My Message Block is a simple message but expanded using the Prompt Elements section.
Let’s break down what I have used here.
The first part is just free text (that I will record later because playing anything back in text-to-speech is not ideal).
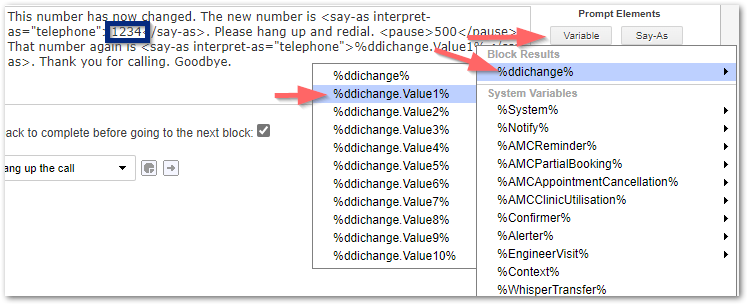
The next part I use the following Prompt Elements. I use the Say-As button and select Telephony (so it reads the number out as a telephone number).
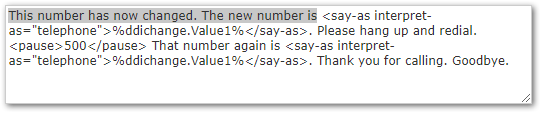
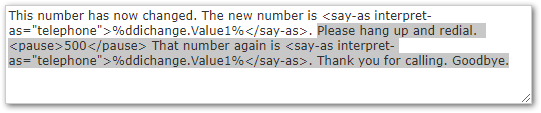
In the middle part, I use the %ddichange.Value1% variable
I changed this by selecting the default 1234 text between the <> brackets, clicking Variable - selecting my %ddichange% Variable and then selecting the Value1 field that references the number I want to playback within the CSV file I created earlier (you can see that I can have up to ten values (columns C-L)).
The final part of my text is free text, followed by a Pause (with the timer changed to 500 rather than the default 1000), replaying the Telephone (say as command) and finally, a goodbye message.
I then tell the block to hang up.
All I need to do then is publish the Dialogue and assign the DDI’s I want.
Done
Hope this helps and if you have any questions, please post a response. Has anyone got an idea where they might want guidance on how to? Or perhaps others have other use cases where they have used similar, feel free to share.
Thanks
Jonathan Redsell
Jonathan,
Once again, thank you.
ftp is blocked for me at the moment but when I’ve got that sorted I will try this out.
I have no doubt that this will do what I need it to do.
Many thanks
Gordon
If you have direct access to your servers (they are on-prem, and you have RDP access), it will be on the d:\syncrhonisation\px\DialogueData folder on your primary system (web) server. Going forward, you can set up FTP/API access to update the file to the location.