A number of people have asked recently "How do I add a new Agent/Supervisor in Liberty Converse?"
Well, the answer can depend on your setup. But I shall try to cover the key points in this thread.
-
There must be an Entity in your Liberty Converse Directory that you want to be an Agent/Supervisor.
-
The Entity must have a Username within the Entity Account Settings.
-
The Entity must have a Class of Service that allows them to be an Agent.
Once you have all these, the rest is straightforward.
So let’s look at each of these points in turn.
Point 1 - An Entity must exist
Start by searching your Directory for the Entity you want to make an Agent/Supervisor. You can do this using Platform > Search the Directory (or the Directory tab and search there)

If the Entity exists, then great, if not, then you need to add this person to your Directory first. This is where it can become complicated, depending on your setup.
You synchronise your Directory Entities from an external data source such as Active Directory.
Suppose you search the Liberty Converse Directory and do not find an Entity that should be synced from your external data source. In that case, you need to check your external data source to:
A. Ensure they are in the data source.
B. Ensure they have all the necessary information to be added via the synchronisation process.
If you are unsure, then get in touch with Netcall Support, who can check the synchronisation settings and see if they are being rejected for any particular reason.
DO NOT MANUALLY ADD ENTITIES; THEY SHOULD BE ADDED VIA YOUR DIRECTORY SYNCHRONISATION PROCESS.
You Manually manage your Entities.
Suppose you search the Liberty Converse Directory and do not find an Entity, and you manually Add/Edit/Delete your Entities from the Liberty Converse web pages. Then they need to be added first.
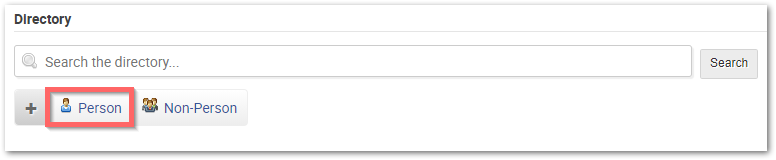
Use the + Person button in the Platform area as shown
Add the Entity using all the relevant fields.
You will need to ensure you enter a First/Last Name and select the required template from your list of templates.
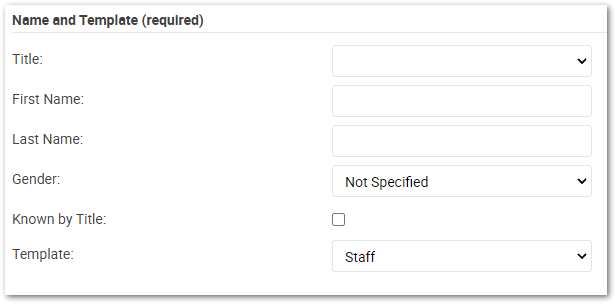
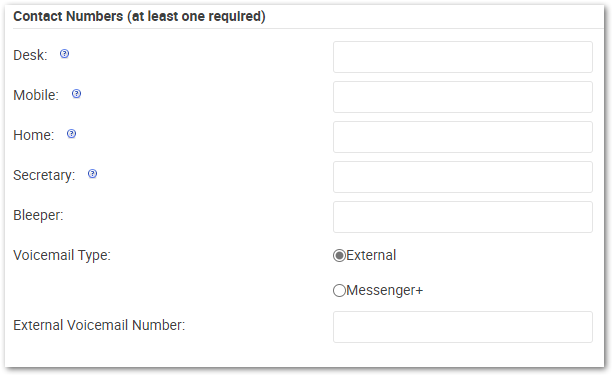
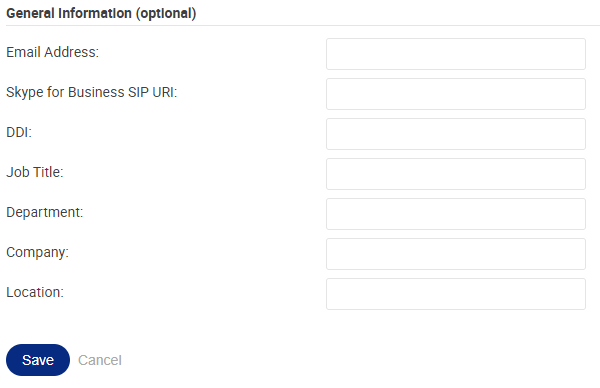
Make sure you have at least one contact method
Now the critical part. The Entity MUST have a Username to log into the Liberty Converse Contact Centre application or any parts of the Liberty Converse Web Administration pages. This would typically be an Email Address, but you may have a different format.
Finish off with as many details as you can (the better the data, the better the Directory). Then click Save.
Point 1 covered.
Point 2 - The Entity must have a Username within the Entity Account Settings.
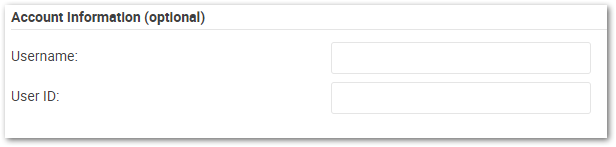
You search the Directory and find your Entity. Great news. Now, do they have a Username? Go to the Entity summary screen to find out. (search the Directory and select the Entity).
You will find the Account Information for this Entity as shown here. To make changes, click the Edit button.
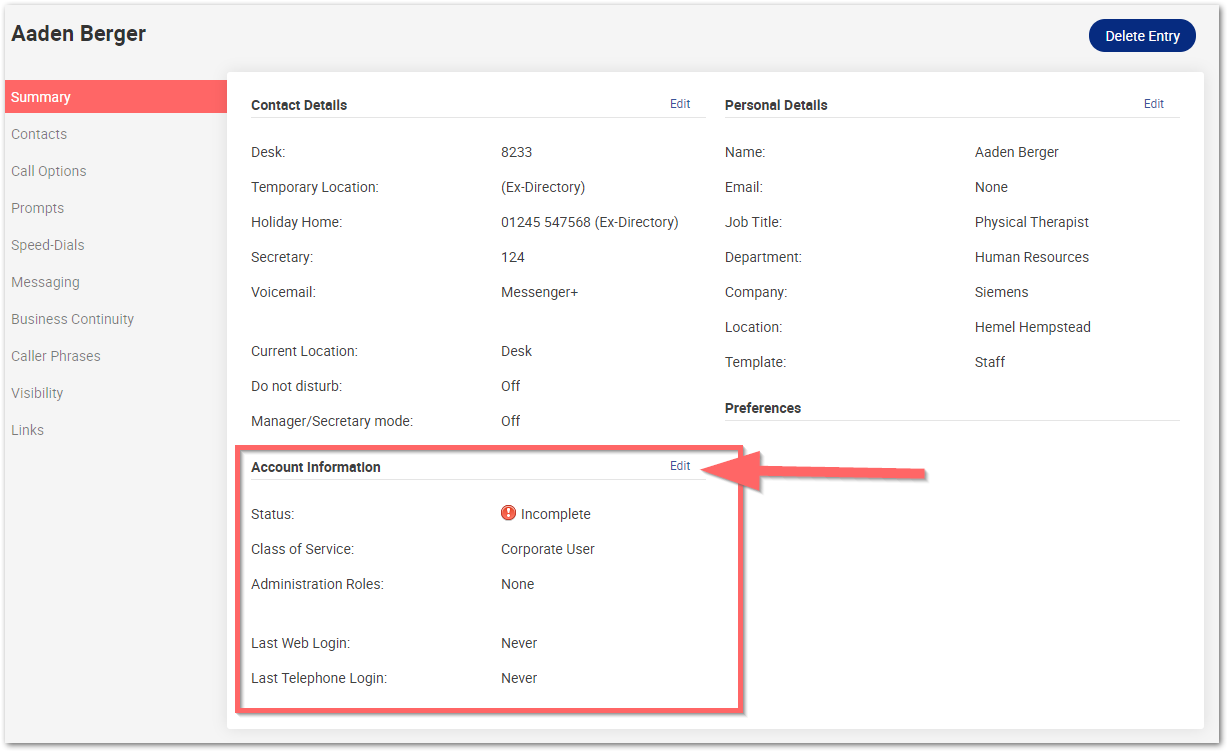
An Entity must have a Username and a Class of Service that allows them to be an Agent. If the Entity does not have a Username, then add one. Again this typically is an Email Address. If it is greyed (like the User ID is in this image), then that means it is a synchronised field, and this data is missing from your external data source. You would need to go back to your data source to resolve. Once you have added or checked that the Entity has a Username, click Save.

Point 2 Covered.
Point 3 - The Entity must have a Class of Service that allows them to be an Agent.
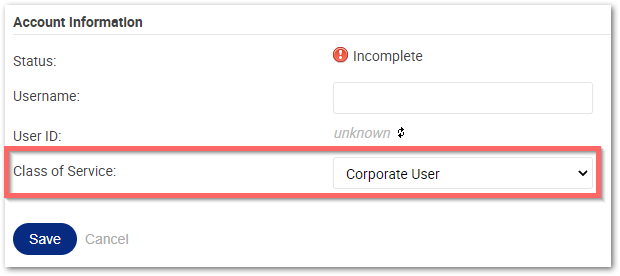
Within the Entities Account Information, you can see what Class of Service they have within the system.
You can check if a Class of service has the Can be an Agent: option enabled by going to Platform > Class of Service and then going into the Class of Service that you want to check and see if

Is ticked. If not, you can either change the Entities Class of Service (Back in the Entities Account Information screen and choose the Class of service from the drop-down list) or tick the box to enable it for all Entities within that Class of Service. There is no right or wrong way of doing this, but it’s probably a good idea to check what an existing Agent/Supervisor has for their Class of Service and copy that.
Point 3 Covered.
Adding an Agent to a Group
So you have an Entity with a Username and a Class of Service that allows them to be an Agent. You can now add them to a Contact Centre Group. To do this, go to Contact Centre > The Group you want to add the Agent to (in this example Contact Centre) > Agents

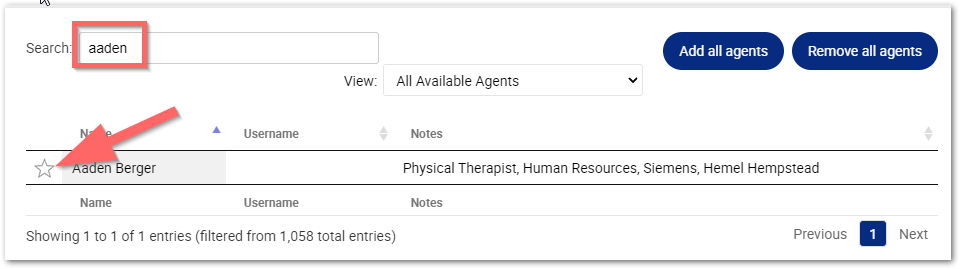
User, the Search box to search for your Entities name, and then click the Star icon next to their name to add them to the Group
Agent Added  Now they will appear in your Liberty Contact Centre Application under Management, where you can add Skills for them to handle Interactions.
Making a Supervisor
To be a Supervisor, you need an Entity with a Username; they don’t need a Class of service that allows them to be an Agent or be added to a Group like an Agent unless they need to take Interactions. Being a Supervisor is all about having the Role (User Permission) to do so. So make sure you have the Entity and the Username and then go to Platform > User Permissions.
I will use the default 59R Group Supervisor permission, but your system may differ if you have more customised Roles, but the process is the same.
-
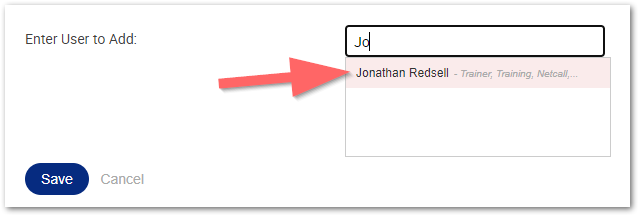
Click Add.
-
Type the Entities name and select it from the list when it appears.
-
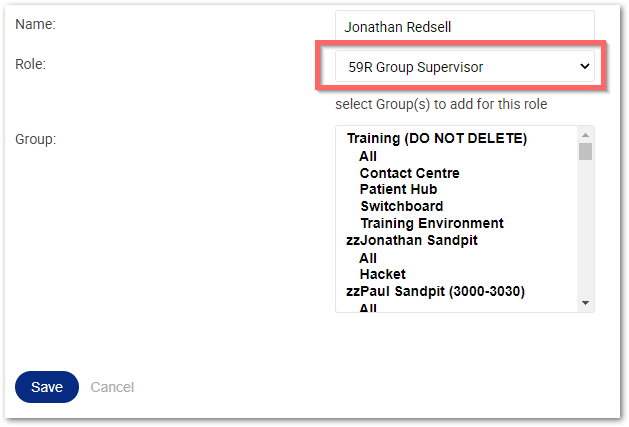
Select the Role you want to assign (in this case 59R Group Supervisor) from the Role drop-down list.
-
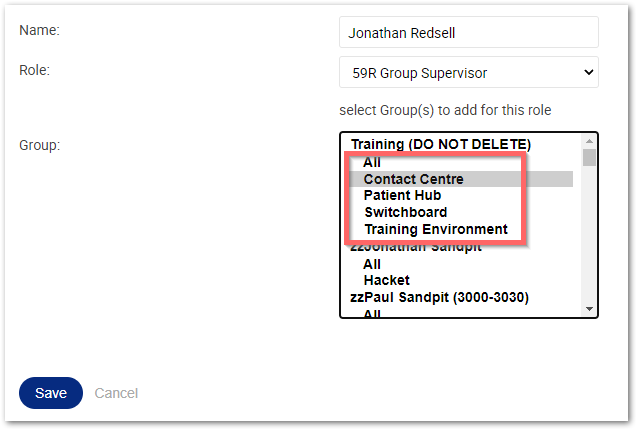
Select Group or Groups and then click Save.
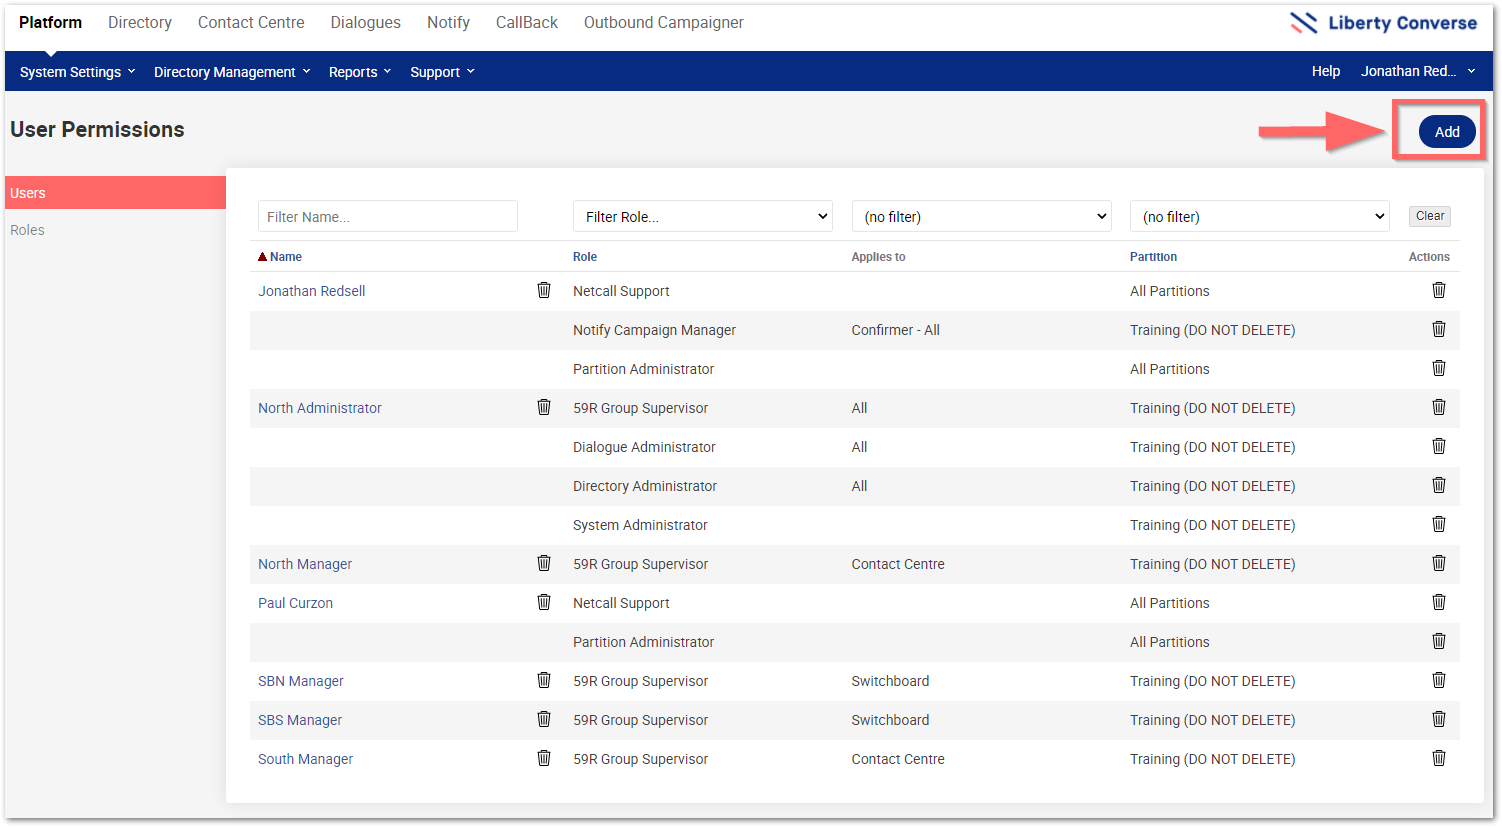
You have made that User a Supervisor
So there you go, how to ensure you have an Entity that can be an Agent/Supervisor of a Liberty Converse Contact Centre.